Posted on 2024-02-28
I spent the past few months making full use of all my physical engineering talents to build a NAS that is completely normal, and not weird at all, and involved an amount of 3D modeling, 3D printing, and hacksawing that is entirely typical of most home computer builds, all in the name of reusing an old laptop.
My previous daily driver computer and current home server is a mid-range gaming laptop from late 2019 that, due to a flat lithium battery and a broken trackpad resulting from a botched storage upgrade, has been rendered more or less useless as an actual portable computer. Boasting an Intel i7-9750H, an Nvidia GTX 1660-Ti, and 16 gigabytes of aftermarket DDR4, this baby has plenty enough power to play Elite Dangerous at a buttery smooth ~90FPS, while generating enough heat to add that extra layer of immersion while flying dangerously close to main-sequence stars to harvest hydrogen from their outer atmospheres. It's also good for Minecraft servers.
Now that it's in use as a home server, I find that the in-built 256 gigs of solid-state storage isn't really enough for my purposes. Now, it's plenty for one or two game servers, which is what I was using it for, but most other applications such as backups or media servers (which I would quite like to have) would be a bit stifled by that amount of space. Hence, a significant storage upgrade is in order.
There's a few ways I could go about this. My laptop actually has a decent amount of upgradeability, with a full-sized NVMe drive slot and a 2.5" SATA drive bay. The simplest, least janky, and most boring solution here would be to buy two high-capacity SSDs, throw 'em in there and be done.
One problem: At over ten cents per gigabyte, those suckers aren't cheap. For this project to make sense, I'd want at least enough storage to back up my whole personal computer, plus a few terabytes of media and other miscellanies. Ideally, I'd like to never have to upgrade my storage again. Laptop-grade drives of that kind of size currently weigh in at about a thousand dollars apiece. If you look in the right places, spinning rust can be had for literally a tenth the cost per terabyte, so the choice is obvious.
Next option: USB external drives. External HDD solutions such as the WD MyBook are cheaper than SSDs and are likely to be very reliable, being designed to be treated as an external peripheral and possibly moved around quite a lot. I could achieve my desired storage capacity by buying multiple of these and connecting them to my laptop.
Issue the first with this idea is that these hard drives take more power in a weirder voltage configuration than a USB port is equipped to deliver, so unless I want to teach myself electrical engineering each one will require its own power cable, which after the first drive gets sketchy fast:
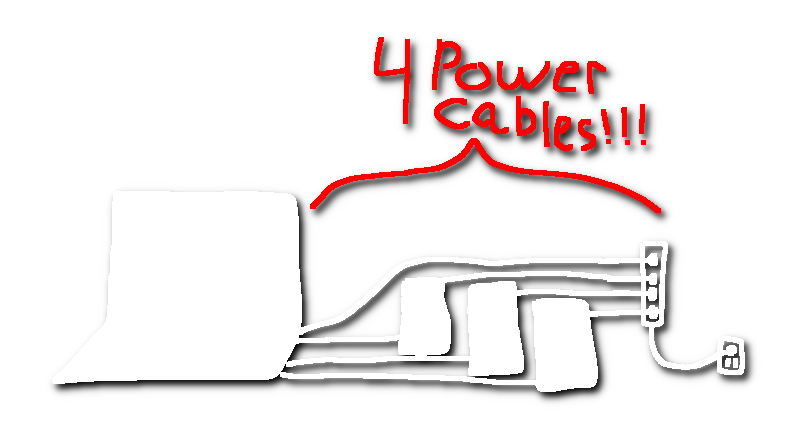
Issue the second is that USB is just not the right tool for the job here. USB is designed for hot-plugging peripherals, not semi-permanent internal aspects of a hardware configuration, so trying to pull any fancy shit like RAID or even just relying on all the drives being recognized every boot opens the door to all sorts of weird, unfixable problems. In other words, it's very janky, and I'd rather just not deal with all that.
Of course, the reasonable way to build a NAS would be to get a machine that's actually fit for that purpose, like an off-the-shelf NAS box or a custom computer in a case with a lot of drive bays or something. I'd also rather not do this. I mean, I already have all this perfectly good computing power right here! I can't just let it go to waste. What I actually did is as follows:
I decided to buy internal PC hard drives and hook them up to the laptop using internal connectors. This would avoid the reliability concerns of USB, and allow me to use off-the-shelf components to power all the drives off of one AC outlet, at a much cheaper price per terabyte than either of the above options. Given most laptops aren't really equipped with the requisite hardware to make such an upgrade, this presented three major problems that I was about to have a lot of fun solving.
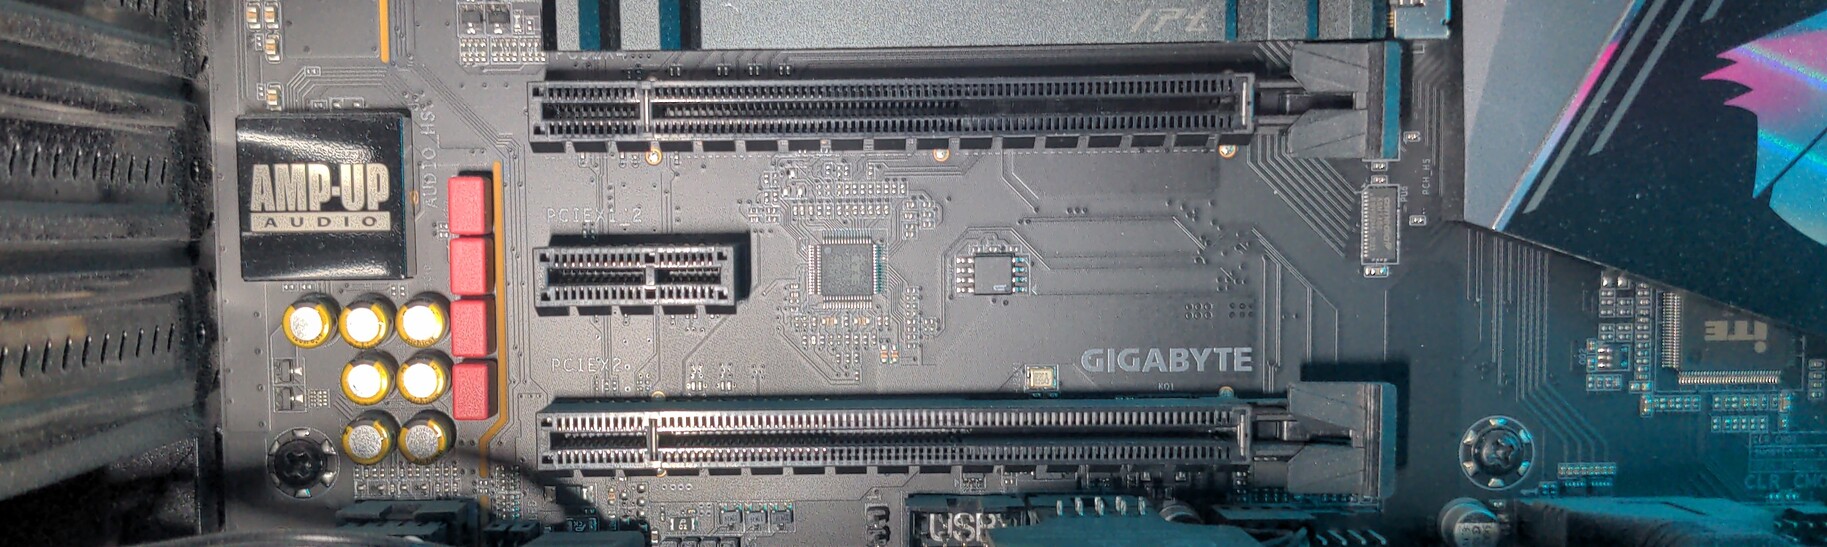
Generally, adding internal HDDs to a computer requires the use of an internal SATA connector. My laptop has one, and I will be using it, but I'd quite like to have more than one of these drives, both for redundancy and raw capacity, so I need a way to add more. In a desktop PC, such expansion would typically be done using a spare PCIe slot on the motherboard:
However, due to the industry's blind rush to make all electronics as thin as possible1, no laptop on Earth has these. The meager modularity present inside laptops is typically found in the form of M.2 slots:
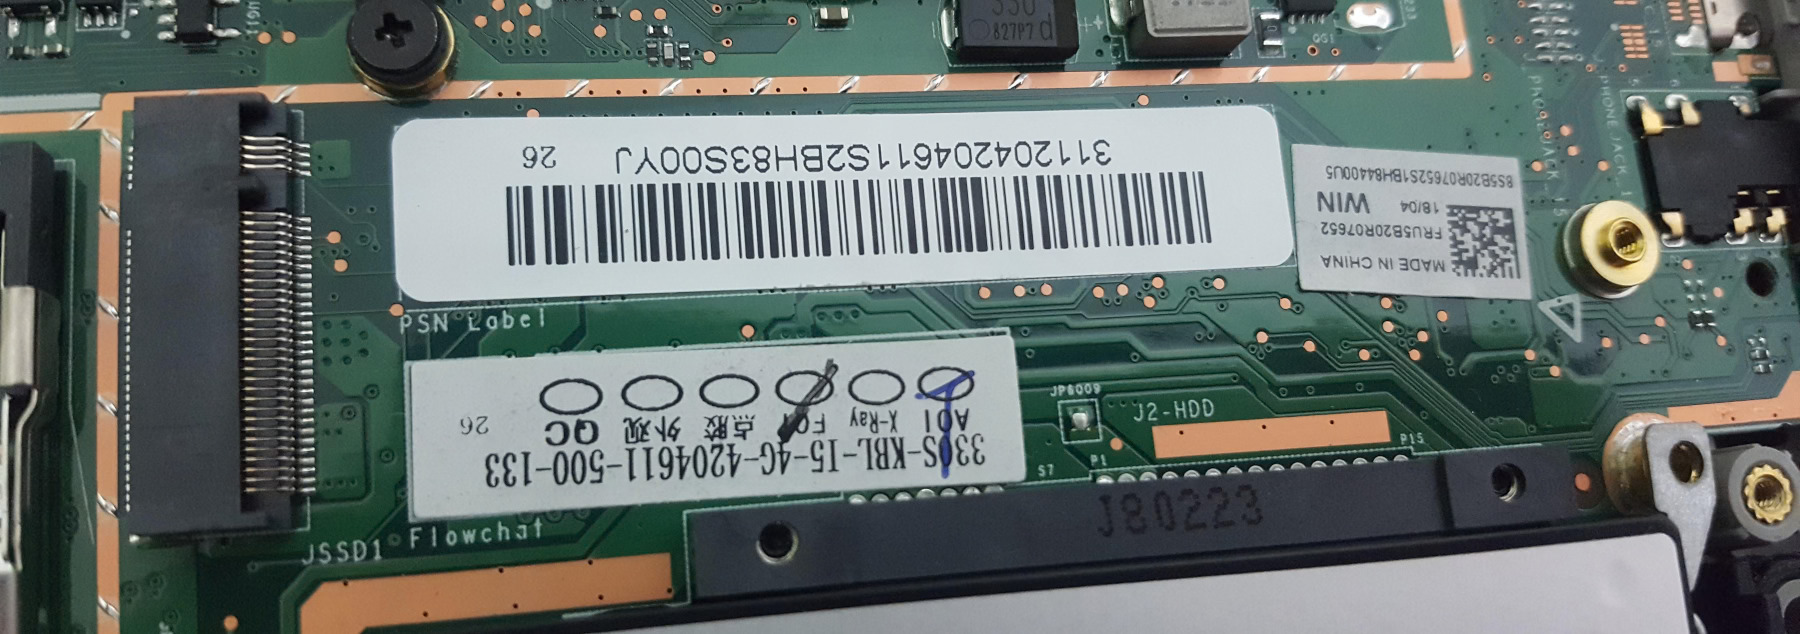
Normally, these are used in computers of all sizes to attach NVMe SSDs, but the secret to the speed advantage of the NVMe over your standard SATA is a fundamentally different protocol: NVMe SSDs communicate directly over PCIe, meaning any NVMe slot is essentially just a tiny PCIe slot, and other types of device can take advantage of that connection, such as the SATA expander that I'll need for this project.
Most laptops, including mine, have two M.2 slots: one for an SSD, and one for a wifi and bluetooth module. You can get SATA expanders for both, such as these two that I bought:
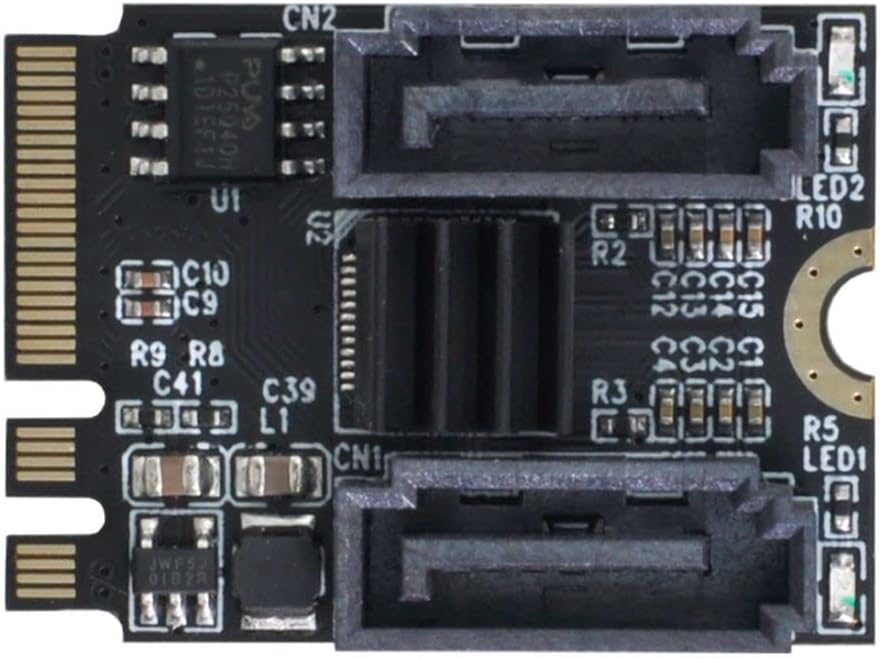
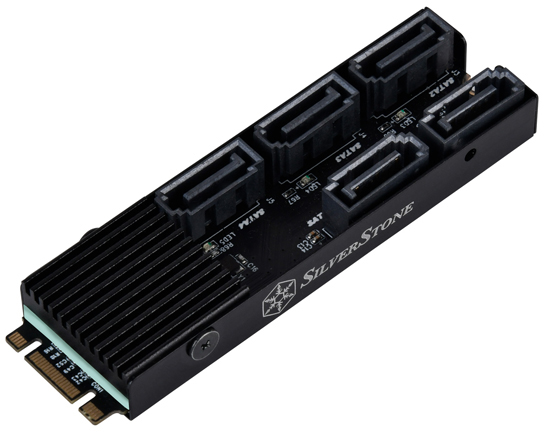
Unfortunately, my laptop didn't want to turn on with a SATA expander in the NVMe SSD slot, so I'm stuck with the dinky two-port one. That's fine, since my server doesn't really need wireless connectivity anyway, and I've got a secret nasty trick up my sleeve that's gonna let me really get the most out of those two SATA ports.
So, SATA as a protocol is designed to have exactly one device connected per SATA port, as opposed to USB, which supports hubs that let you turn one port into several and connect multiple devices. However, that's also not actually true at all. For reasons that are honestly beyond my understanding, some SATA controllers, such as the one on my little M.2 module, support devices that essentially do for SATA what hubs do for USB, allowing me to connect multiple drives per port.
This feels a little like forbidden dark magics to me, and it probably isn't great for performance, but it lets me connect more drives so I'm using it. Keep in mind, all this is to reach a level of connectivity that almost matches what the motherboard in my desktop computer supports out of the box.
Don't mind the fact that I had to cut holes in the bottom of my laptop to hook stuff up to the SATA ports. Just, um, ignore that.
Now that I've got my laptop talking to all these drives, they need power. I'm sure I could get this from the laptop somehow, but I'm not an electrical engineer, and the point of this project is to not have to buy a new computer, so I'll have to get it from elsewhere.
The best way I'm aware of to power multiple hard drives from the same source is a PC power supply, such as the one I'm currently using to power the drives in my desktop PC. In fact, as part of early testing I actually had to power some drives off of my desktop PC while they were connected to the laptop. I wish I had pictures to show you of that, it was so fucked.
Trouble is, PC PSUs rely on the motherboard for control. Specifically, one of the contacts in the 24-pin motherboard connector needs to be shorted to ground for the PSU to actually "S" any "P". I could do this manually with some wire, but that has the potential to be unreliable and also maybe a fire hazard. Enter this thing:
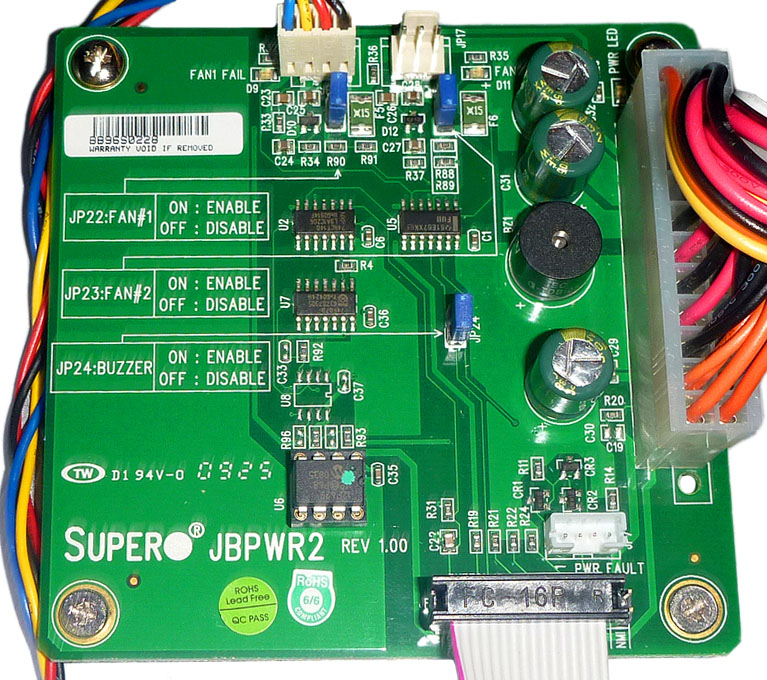
This is the Supermicro CSE-PTJBOD-CB1. It's a part from a Supermicro JBOD enclosure, and it exists to solve my exact problem. This little board's entire purpose is to interface a power button (and some fans) with a PC PSU, which is exactly what I need. Lucky me!
Pictured above is the exact board mentioned in the Serve The Home article I learned about this from, but this specific model appears to no longer be available, so I'll be using the more fully-featured CSE-PTJBOD-CB2. The only difference that matters for me is that it has headers for more fans and a power button LED.
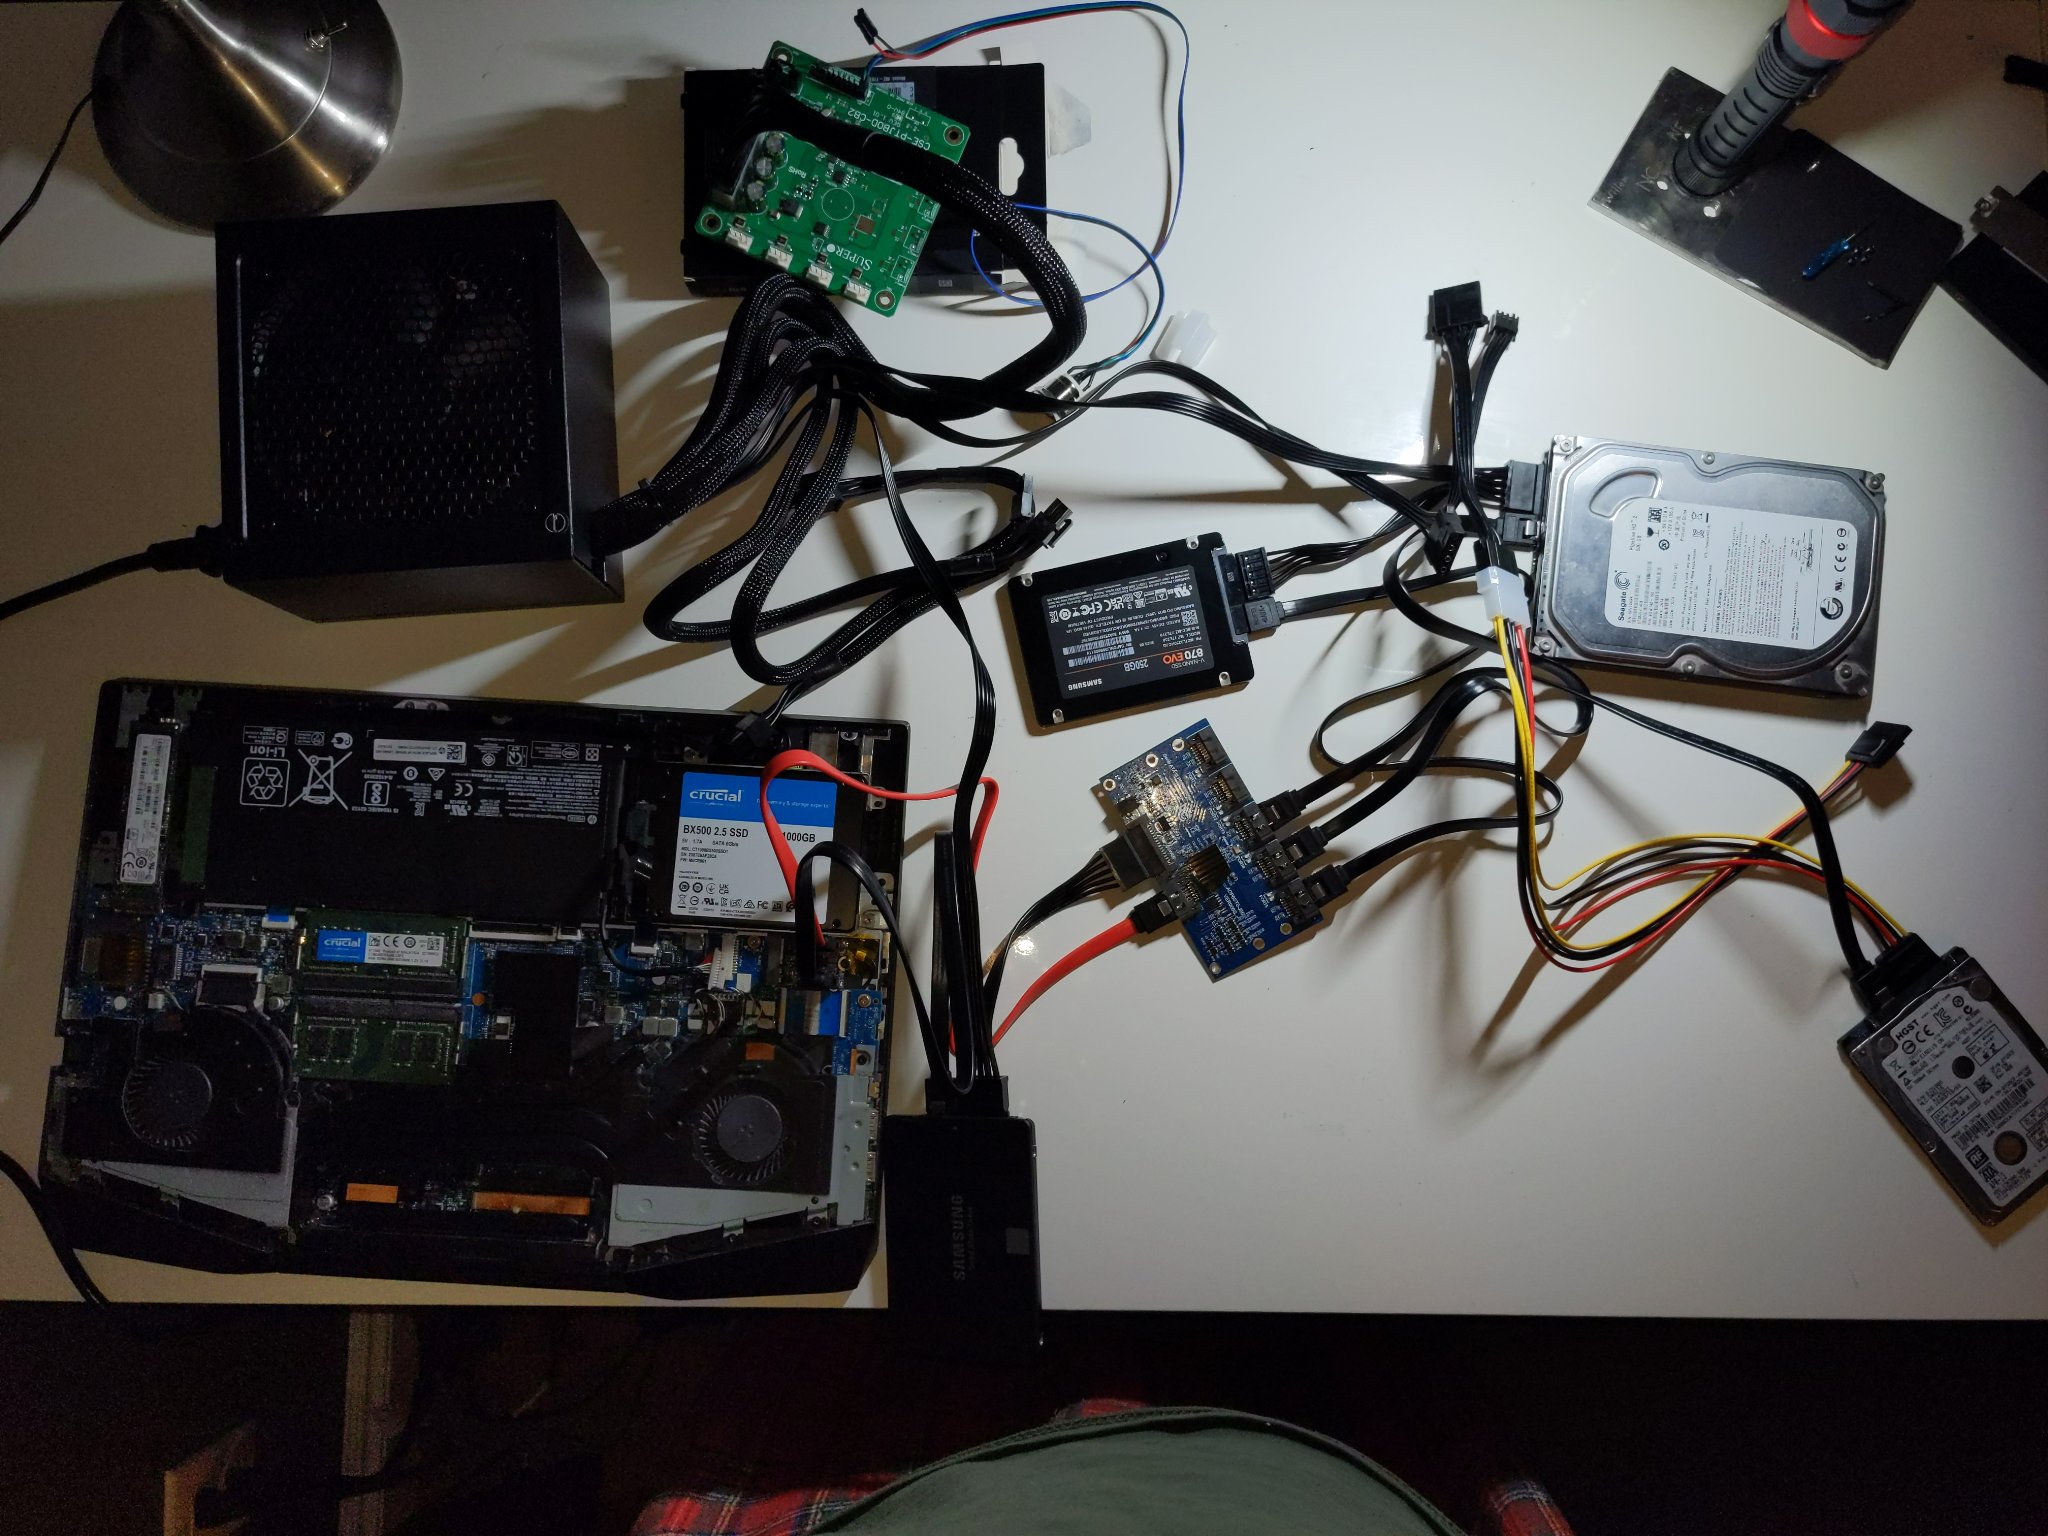
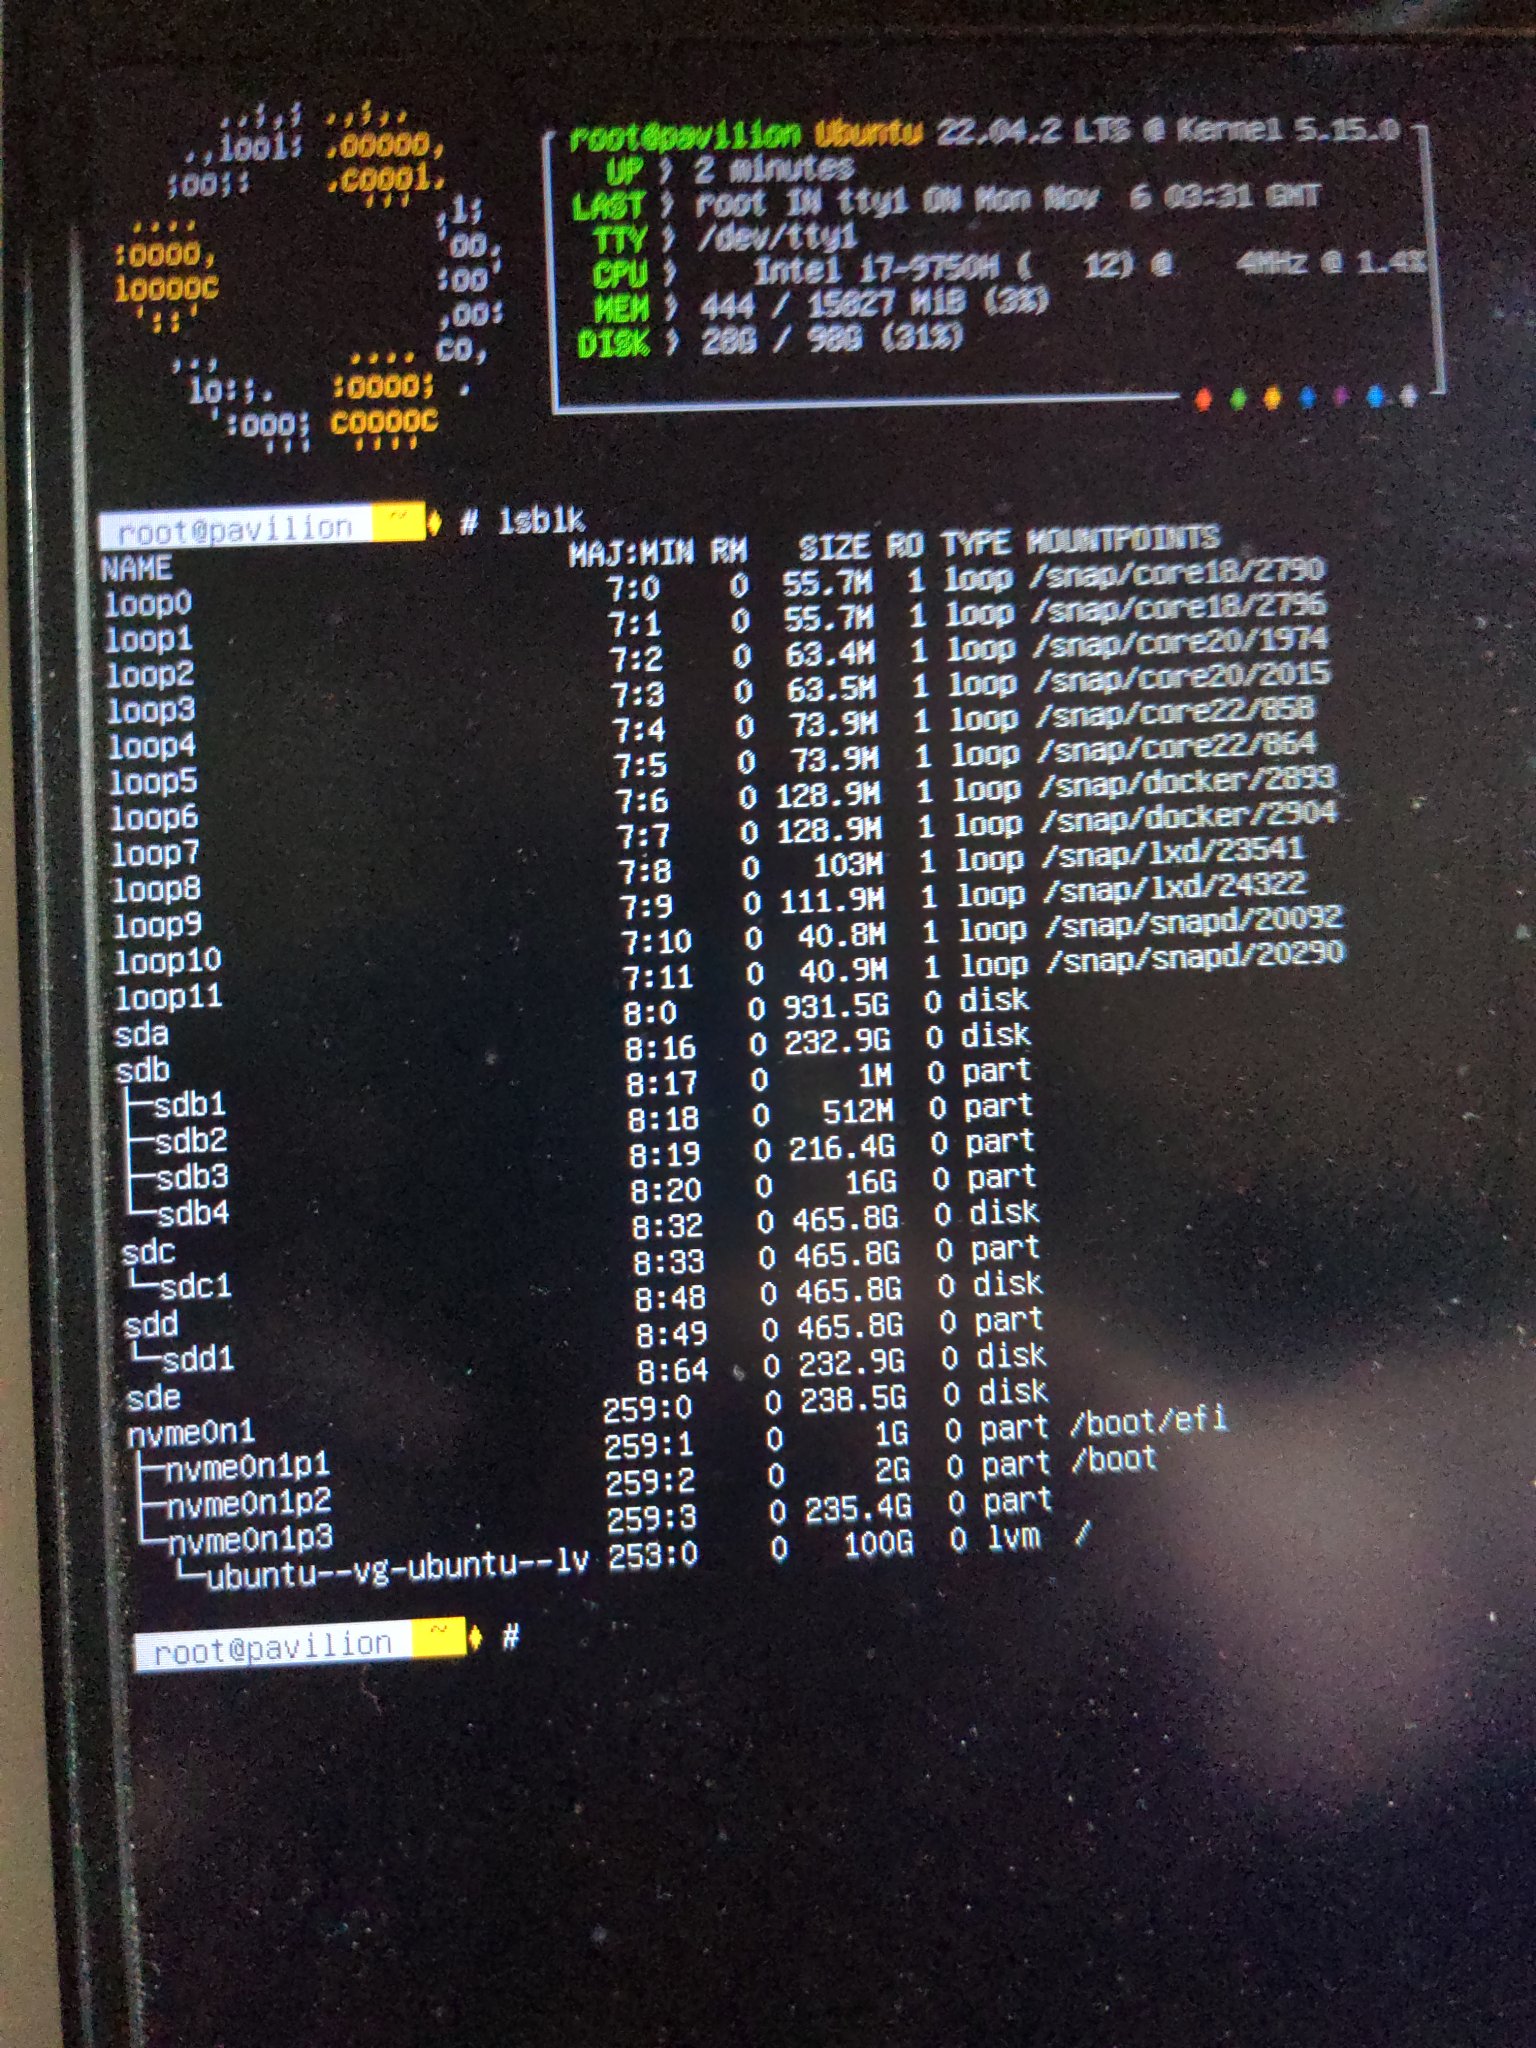
With power and storage solved, I could now confirm that this crazy plan was actually going to work. Here's a video I recorded documenting this historic moment:
And furthermore, photos of the SATA splitter working:
I could run this whole setup naked, strewn out across my desk, but I'm not doing that, so I'll need a case. Unfortunately, they don't make computer cases designed for this use case. I shall have to build my own.
There's a few different ways I could go about this. I've seen people make custom computer cases out of wood. This guy modified a rack-mount server chassis to accept his laptop's motherboard for a similar project. I don't have much in the way of woodworking ability and I'm not planning to disassemble my laptop for mounting inside a computer case, but I do have a 3D printer.
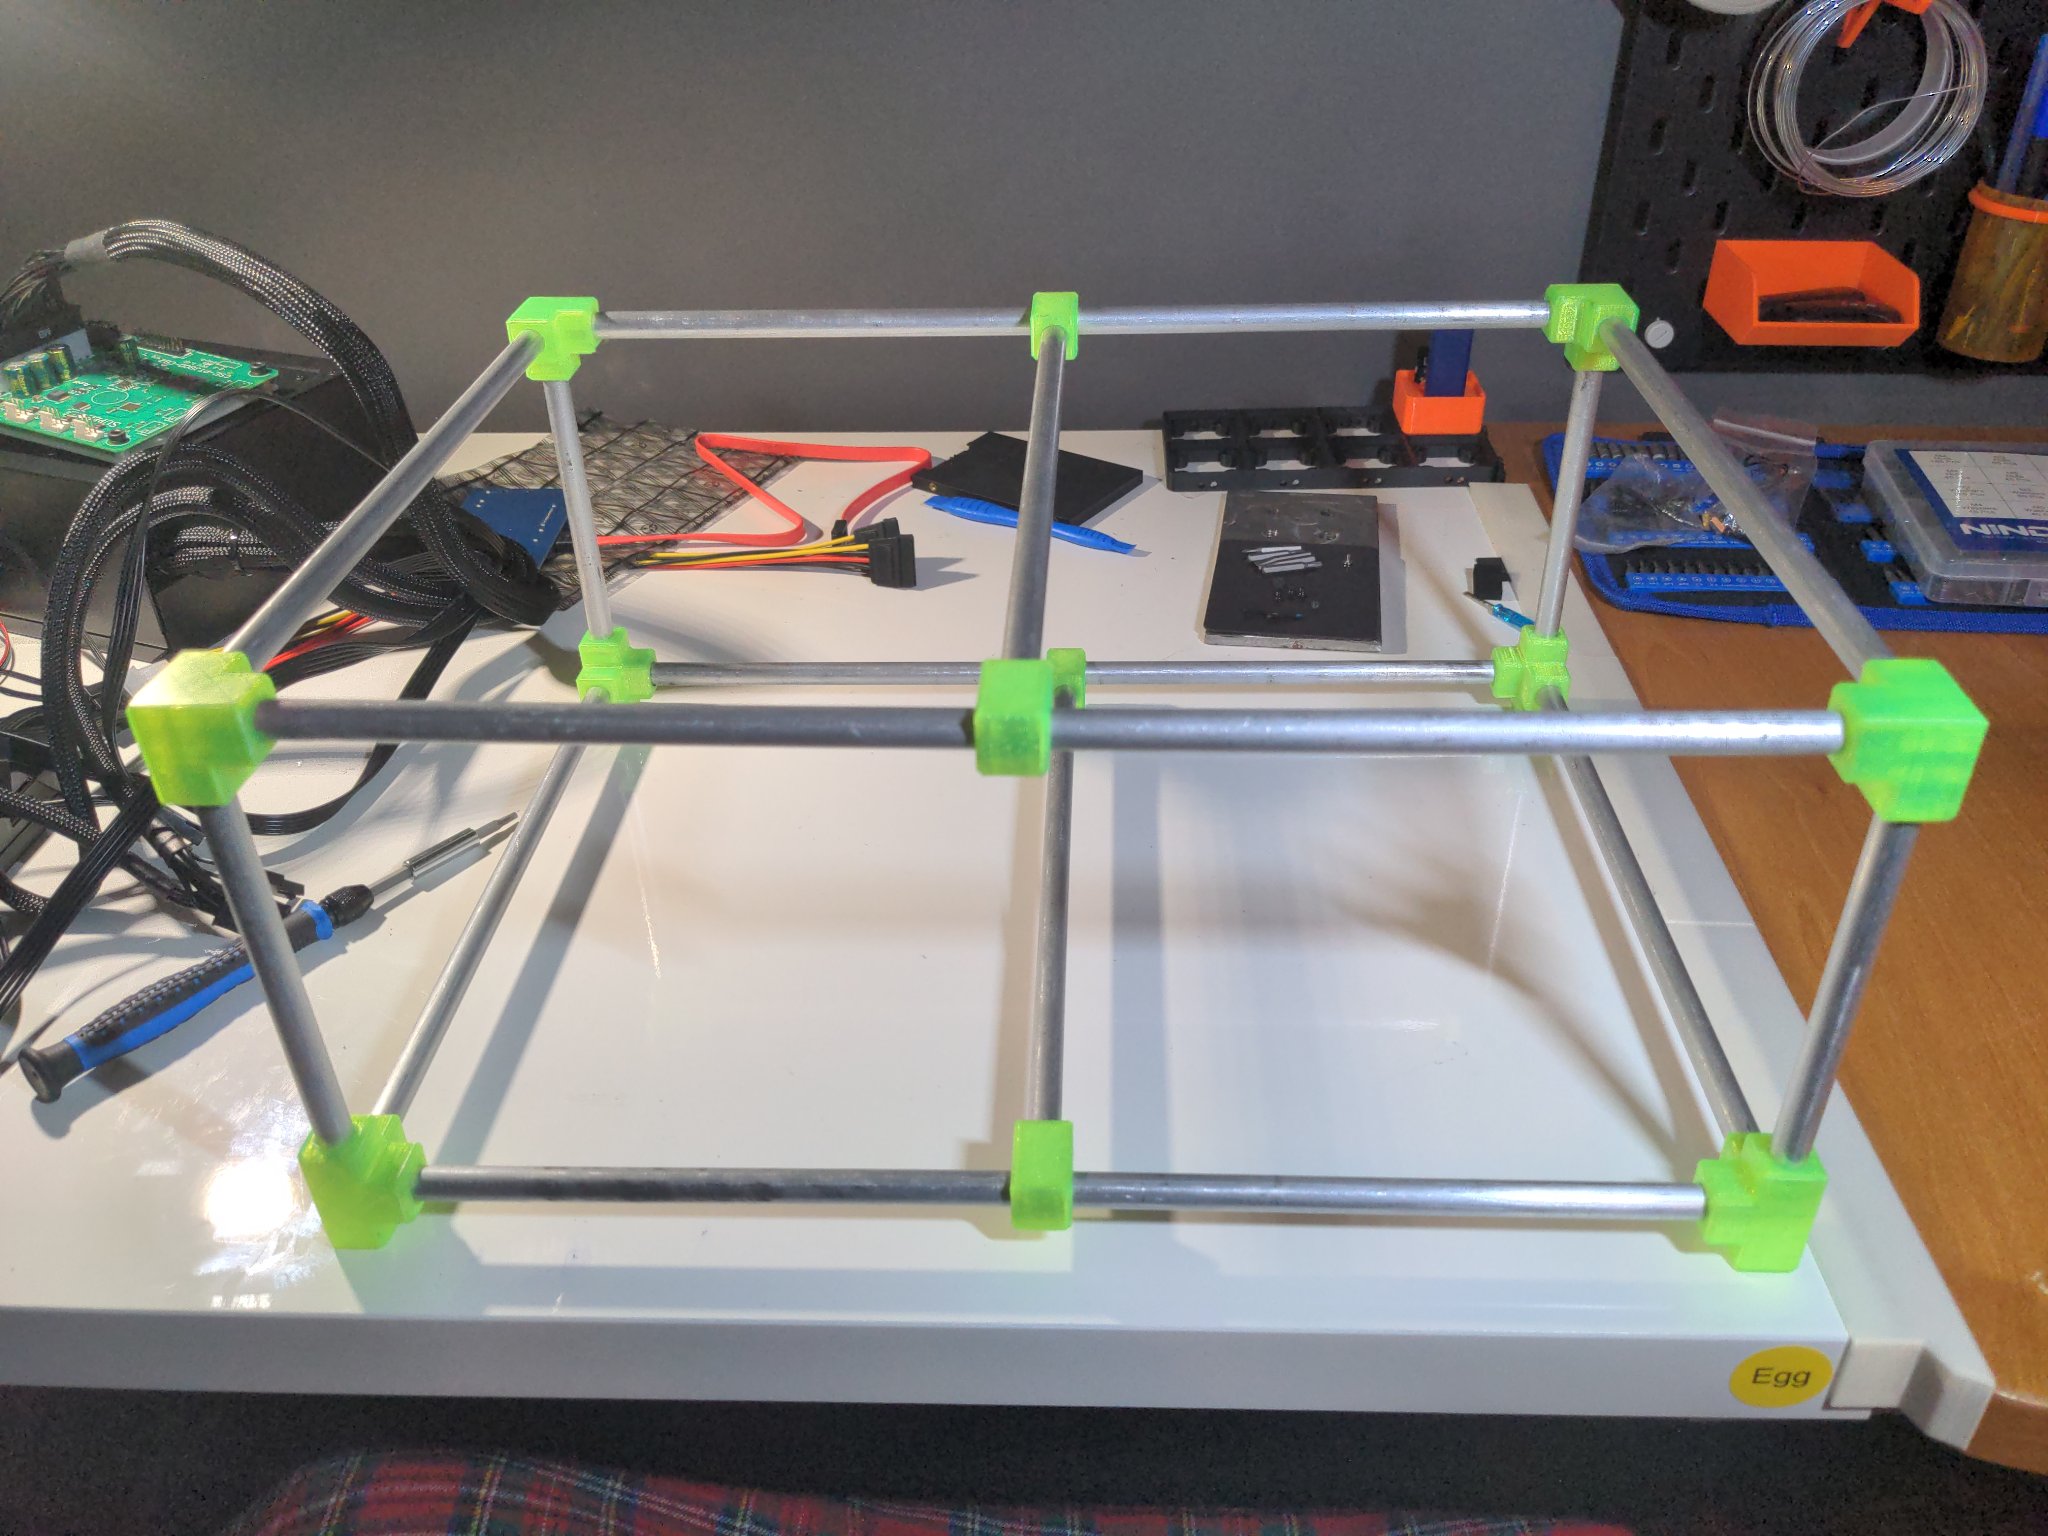
I could 3D print the whole case, but that seems like it would take a lot of plastic, and more importantly, be a pain in the ass to design, especially since my 3D printer is smaller than the case I'll need to make so I can't really print it all in one go. My plan is to make the main structure out of metal rods, and 3D print various brackets to attach everything together.
I originally wanted to order the rods custom-cut to the lengths I'd need, but on top of being kind of expensive the shipping would actually cost more than the rods themselves. In other words, too expensive. Fortunately for me, it turns out hardware stores sell lengths of steel and aluminum rods, the latter of which I can easily cut at home with a hand saw.
So I bought 12 feet of aluminum rods, manually cut them to length, and then 3D printed little corner pieces out of PETG (in translucent green to match the accents on my gaming-ass laptop) to join them into a frame:
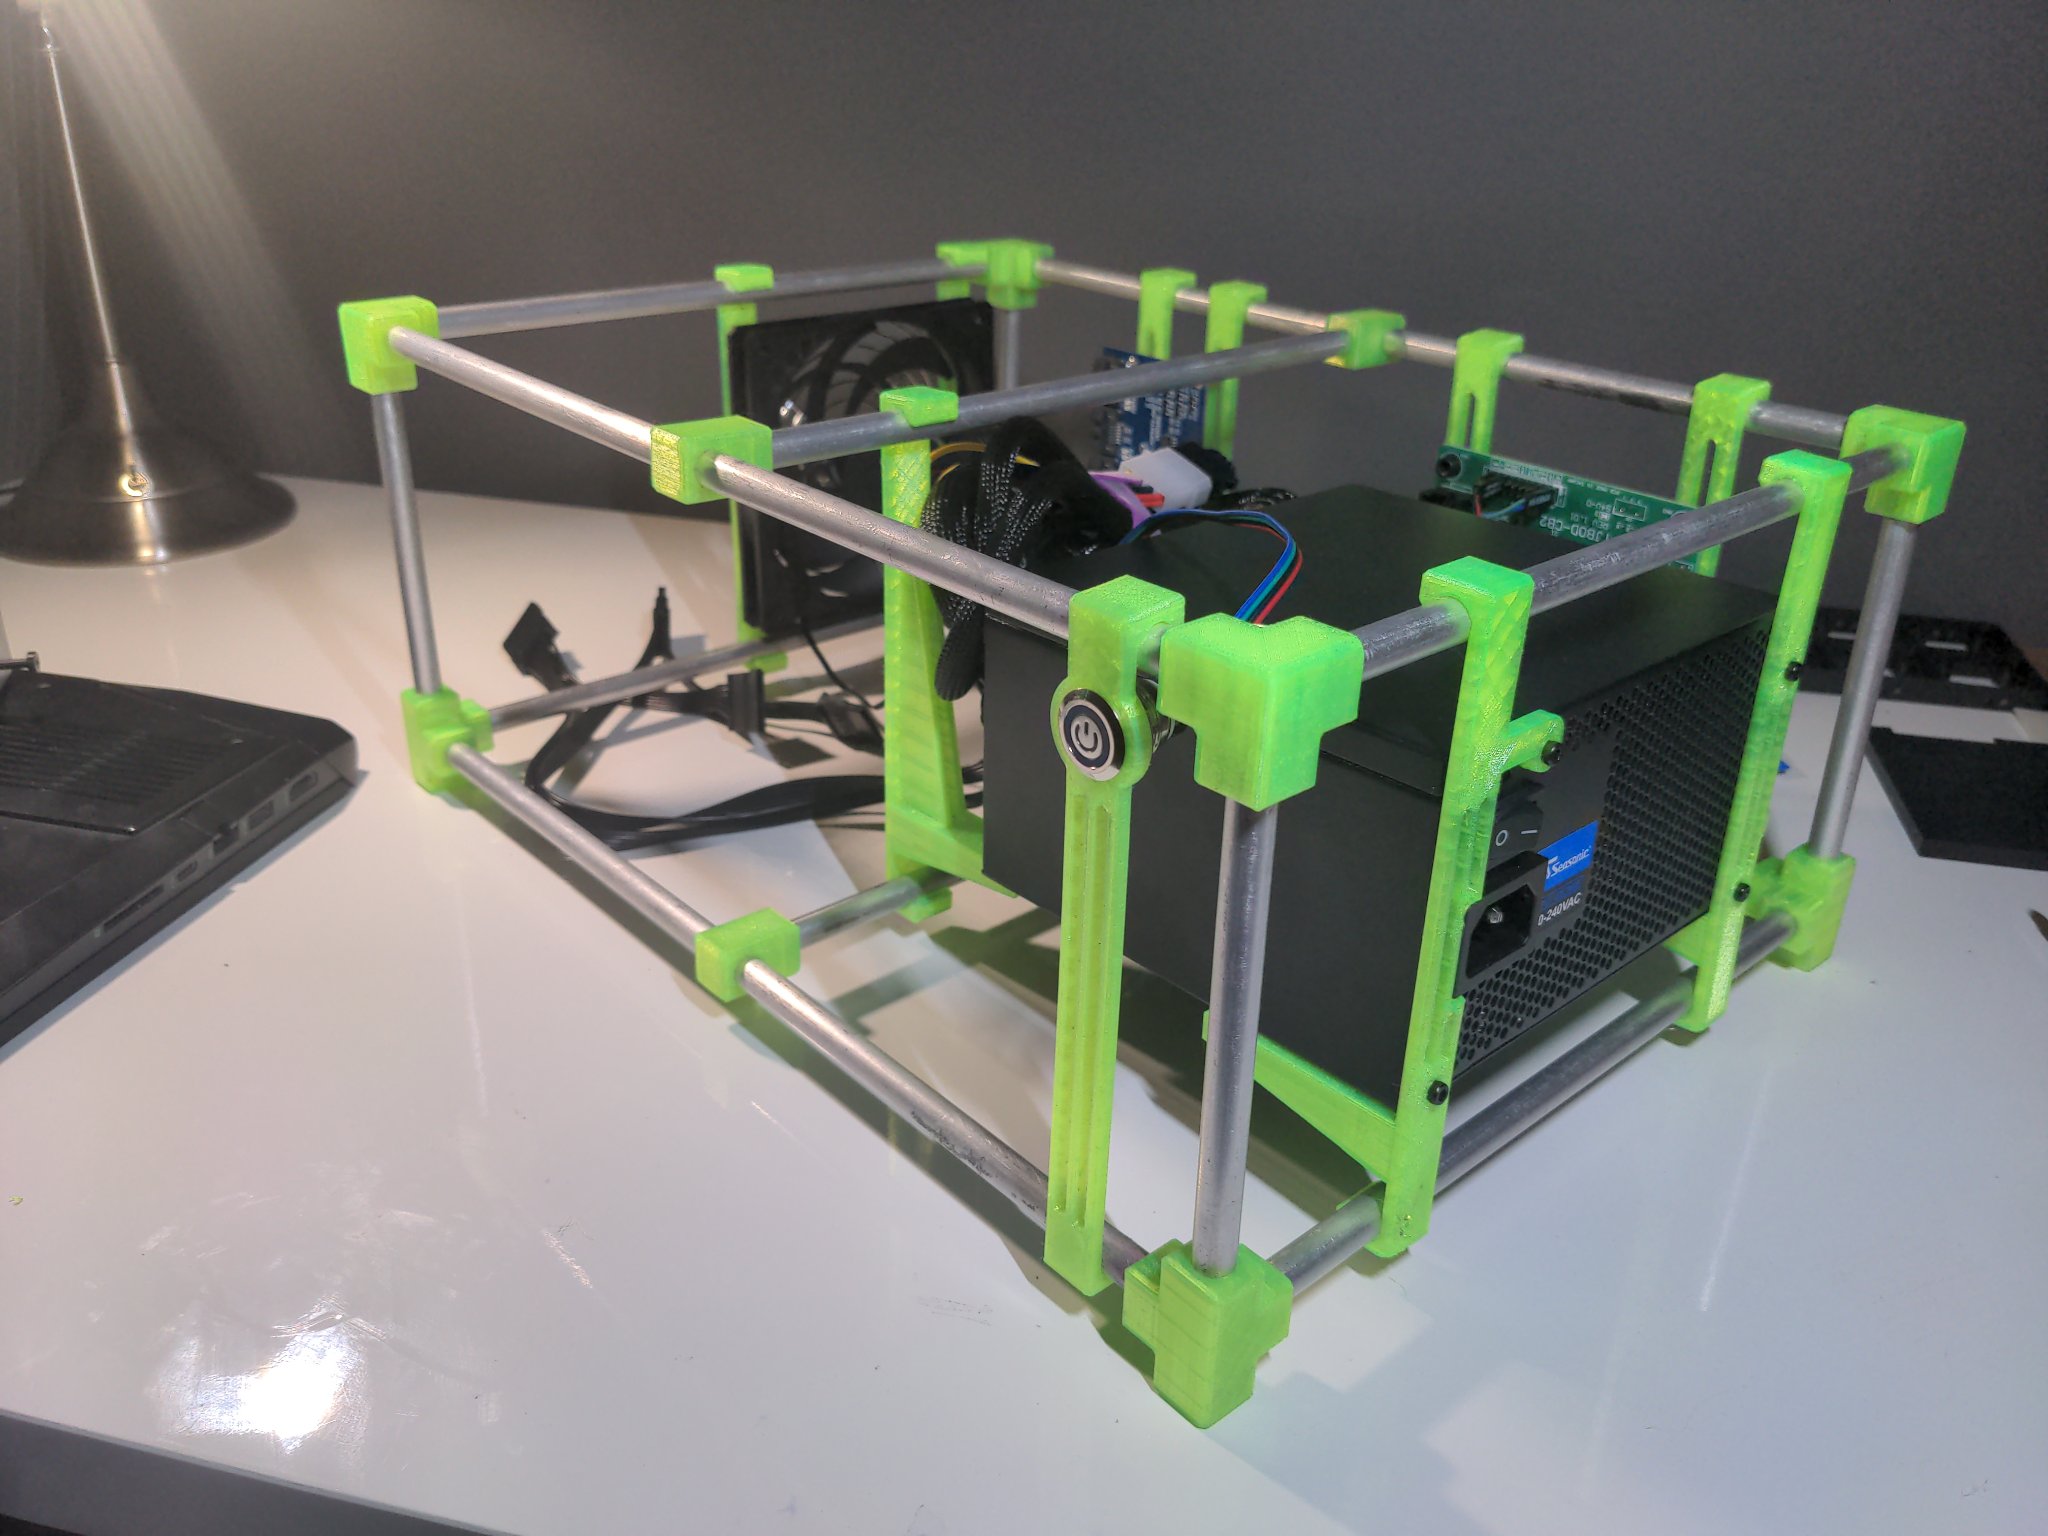
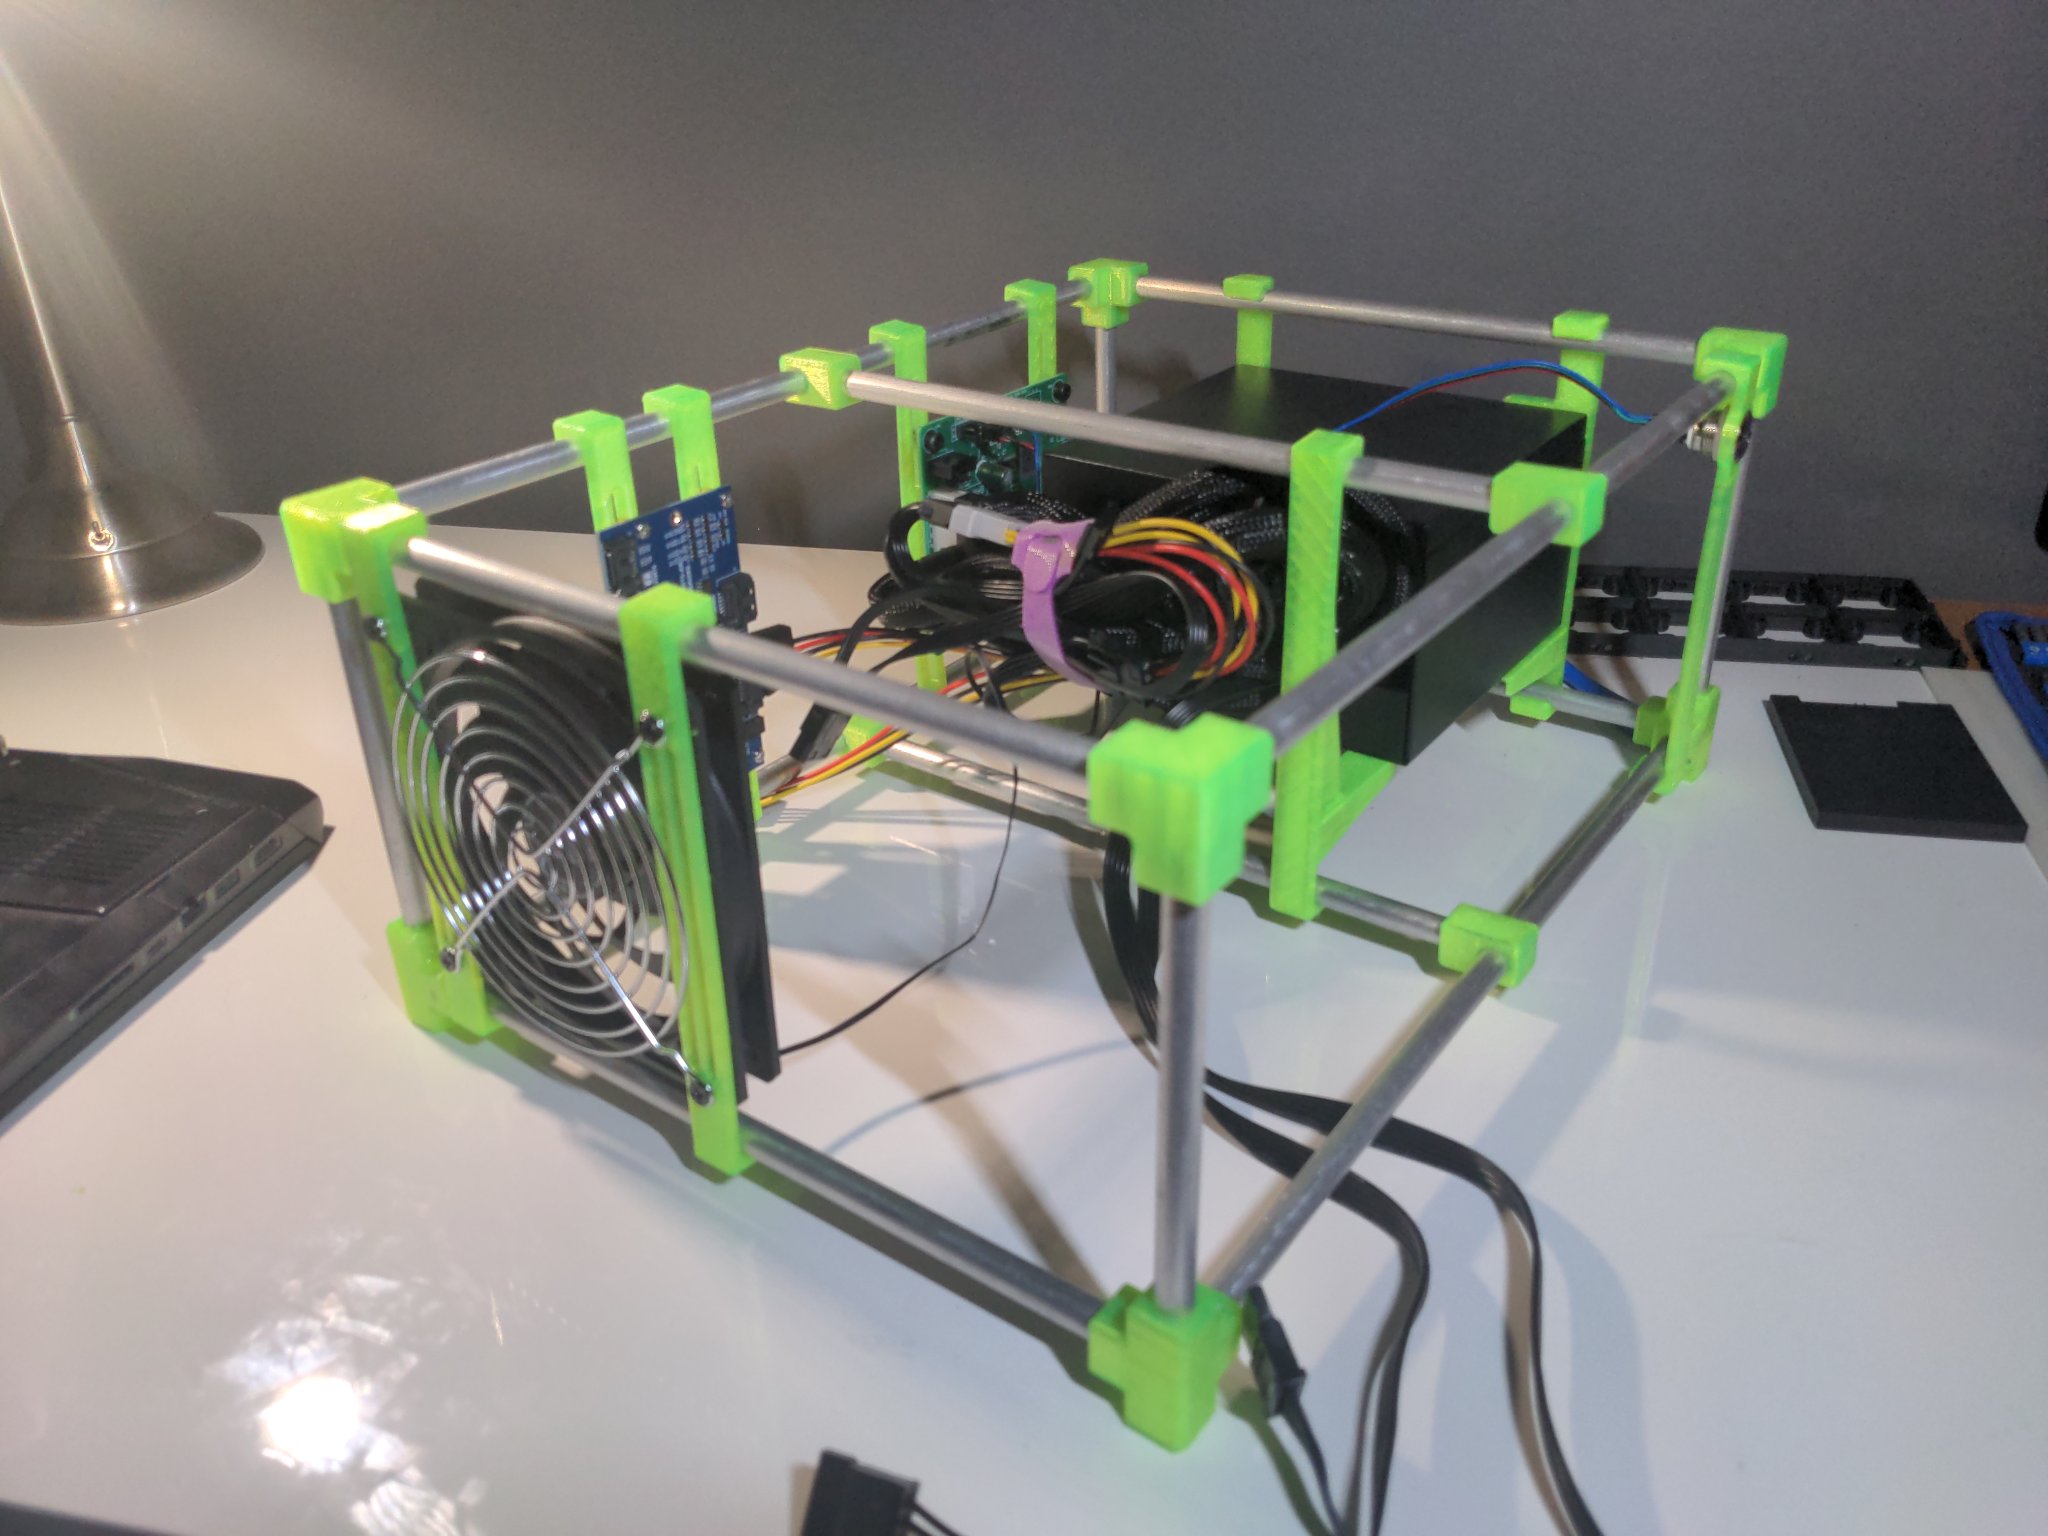
Now I need a way to mount hard drives to this. I considered 3D printing a rack of some kind for them, but I don't know how hot these things get and for obvious reasons I honestly just don't want to take any chances with them. For this reason, I instead bought a drive cage designed to mount to a couple of 5.25" drive bays, and mounted that to my frame. In fact, the height of the frame was chosen based on the size of this part.
This cage also accepts a fan, so I figured I'd add a couple of those to the case, too.
I attached everything to the frame using various simple 3D printed brackets I designed that just snap onto the frame, and then the various parts can be screwed into them. I specifically designed it all in order to reduce the amount of precision that was required of me.
I wanted to make some kind of fancy bespoke mount for the laptop, but that turned out to require a lot of precise measurement and modeling that I wasn't prepared to do, so I just put a normal laptop stand on top of this thing.
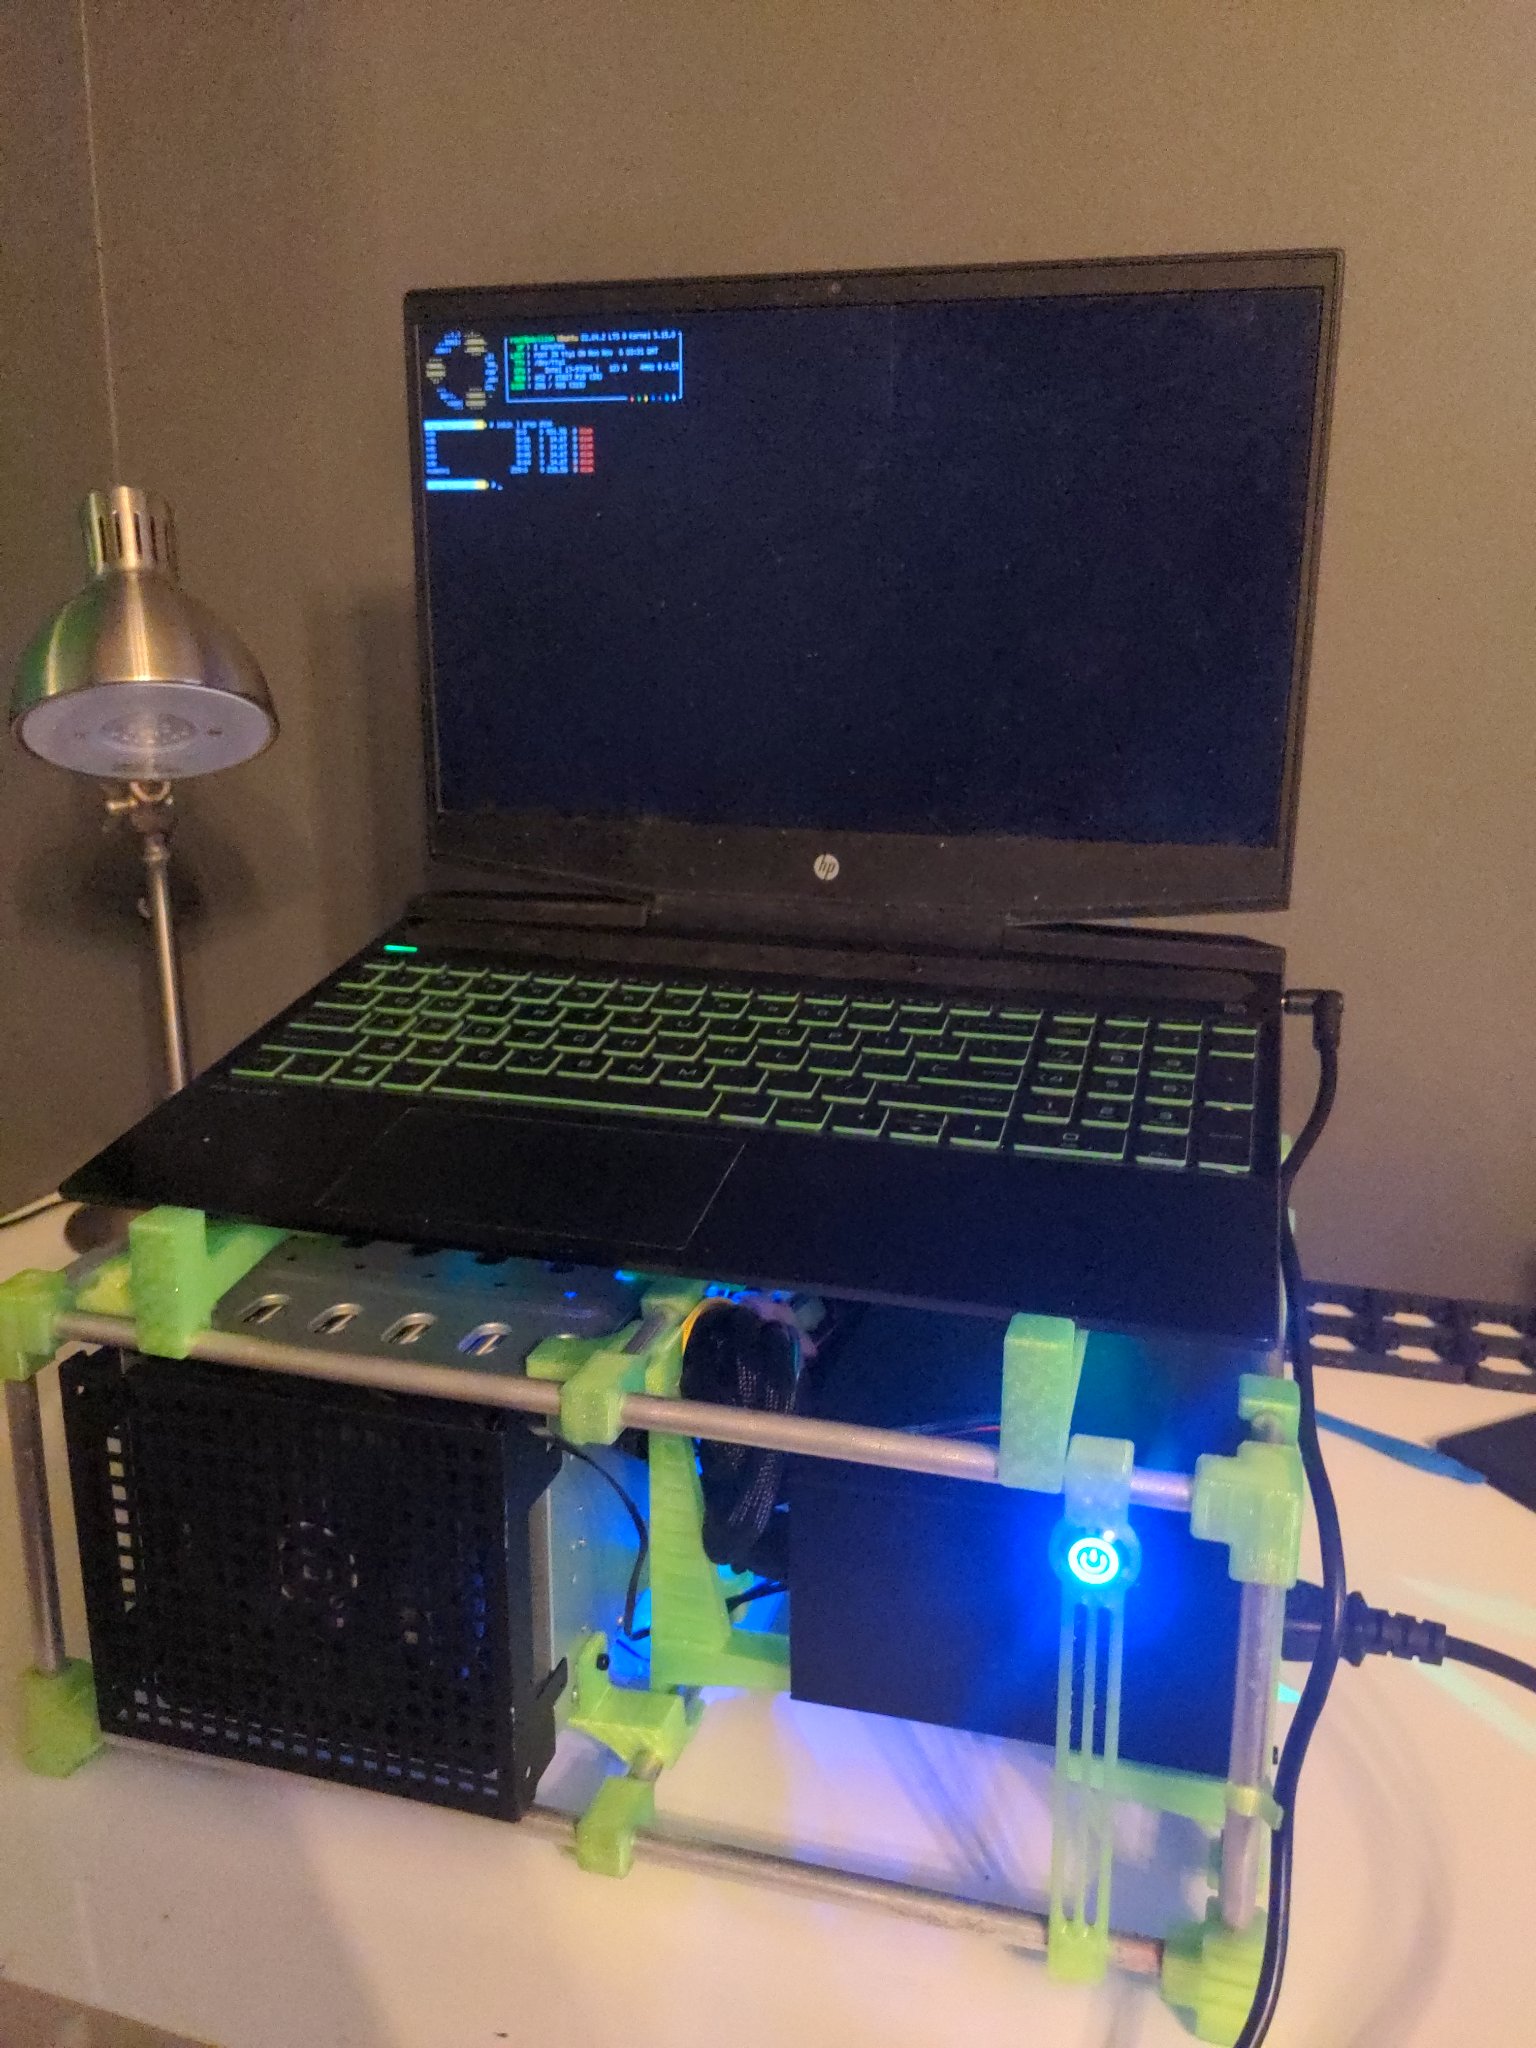
IT'S ALIIIIIVE!!!
This post is mostly about my fucked up hardware, but I figured I should share my software setup too. It's TrueNAS. I went with it because it boasts a lot of fancy features and smooths out a lot of processes that I was intimidated by the idea of doing manually in the terminal. This is probably the most normal part of the build by far, and I think some of the jankiness of the hardware side has infected it. I tried to run Syncthing on it and it just... didn't take. I don't know how else to describe it. TrueNAS is pretty good though.
As of writing, I've been running this thing for a couple months now, and it's been pretty good. I haven't done a lot with it yet beyond some basic backups and a Jellyfin server that I have yet to make accessible from outside my LAN, but it's been mostly reliable so far. It even survived a power outage once with no issue, though I'm currently looking into UPS solutions to make sure that doesn't happen again. All that isn't to say I'm completely happy with it, though.
Firstly, after I built the chassis I discovered that you can get v-slot aluminum extrustion in custom sizes meant for exactly this type of project. They call it MakerBeam. If I had to pull some bullshit like this again I would have probably used this stuff instead of hardware store aluminum and a hacksaw.
I also didn't do a perfect job of designing the 3D-printed parts. I think they came out pretty good all things considered, but I made all the brackets just a little too short and they're all a little bit bowed. Fortunately I used PETG so it just looks sketchy - PLA would have snapped by now, which I know because my first PLA test print snapped instantly!
The PSU I used, a Seasonic S12III, is also a bit dubious. I picked it because it was cheap and my other Seasonic PSU is working well, and it's worked out fine so far, especially because it's a 500 watt unit which is kind of extravagant overkill for my use case, but after I bought it I learned it's actually one of the shittier units Seasonic sells. Apparently they outsource the manufacturing to some other company, which strikes me as weird considering a bunch of other companies outsource PSU manufacturing to Seasonic. At any rate, it's been fine so far and I don't expect it to blow up running at a fraction of its rated wattage.
I got the hard drives from a website called ServerPartDeals.com that sells recertified high-capacity HDDs for like half of what they'd sell for new, and while a few months of use isn't enough to say for sure whether that was a good idea, they've certainly left a good impression. The drives I bought arrived encased in foam, inside a box which was itself packed inside another padded box. With that level of care on the part of the seller, I'm pretty comfortable trusting these drives with what I need them for.
And now the elephant in the room: I cannot in good conscience recommend you do this. Having a NAS is a good idea, and using an old laptop as a basic server is a good idea, but if you're going to build a NAS like this then you should really procure a purpose-built machine, or at the very least an old desktop that can accept some extra drives. Definitely, definitely don't buy a new laptop with the intent to do this.
In order to make this work I had to replace my laptop's wifi card with two layers of janky, probably AliExpress-tier hardware that is, frankly, probably introducing performance bottlenecks, or if I'm lucky, bottlenecked by the relatively low-speed interconnect of the wifi card M.2 slot. Bear in mind, that slot needs at most 1 gigabit of bandwidth to fulfill its intended purpose, which is about a sixth of what a single SATA 3 port can do. According to my research, that thing has two separate PCIe Gen 2 x 1 interfaces. Who knows what my cheap SATA controller is even doing with that.
Plus, interfacing with this thing makes it painfully obvious that it was not designed with this kind of bullshit in mind. I ran into all kinds of Laptop Bios Moment™s during this project, from the CMOS resetting every time I made a hardware change to the machine refusing to even POST with anything but an NVMe SSD in the NVMe SSD slot. I was gonna put connectors for FIVE hard drives in there. I wouldn't have even needed the SATA splitters.
Honestly, I only did this at all because I figured adapting this thing to this use case would be cheaper than procuring a new machine that was as fast and I didn't want it going to waste. All that said, I have a NAS now, and it's good enough for me, and this whole adventure was a hell of a Learning Experience™ so I really can't complain, though if you gave me the amount of money all this stuff would have cost new to put toward a new NAS, I would have done something else.
1. This is a joke. PCIe expansion cards are genuinely too bulky to fit in anything with portability as a design goal. However, despite Tim Cook's best efforts, this is not true of most other expansion options.